Thursday, February 27, 2014

Finishing sterling silver with liver of sulfur gel

I've known about the option of using liver of sulfur to oxidize sterling silver for a long time but I've never really wanted to try it.  The process looked so cumbersome and there were lots and lots of warnings about ventilation that made it seem like it was more trouble than it was worth.  The LOS I saw came in small rock-like pieces that could be dissolved in hot water (not too hot though - that's when the fumes become poisonous).

But when I was placing an order for sterling I saw some in a gel form that promised an easy process with no waste.  My typical oxidation efforts come from hard boiled eggs that don't produce fast or intense results so I decided to give it a try.

I'm smitten.  I can't believe I waited this long to try it.


The whole process only took a few minutes - the prep really took longer than the oxidation.  I gathered up a few glass containers to dedicate to the process and decided to use fairly cold tap water because the LOS results come more slowly that way.  Since this was my first attempt I wanted to take it slow and monitor the development. 

The set up:
  • Dish one: cool water and eventually the LOS gel
  • Dish two: cool water and baking soda (to neutralize the LOS)
  • Dish three: baking soda only (further neutralization)
  • Wooden sticks - I had some in with my resin materials that I think I got at a craft store
  • LOS gel
  • Two sterling pendant settings

See how shiny that silver is?

I just dipped the wooden stick into the LOS and then stirred it into the water.  Truly, a tiny amount. I think that LOS jar will last for. ev. er.


I saw the changes start the moment I added the sterling pieces to the dish.


After a few minutes and I fished the pieces out with the wooden stick and moved them to the baking soda/water dish to neutralize the LOS.


That's a lot of oxidation for a couple minutes!

I moved each piece to the last dish and rubbed baking soda onto the high spots to remove some of the oxidation - the whole point is to add depth to the piece, so I need some areas with polish and some with oxidation.  The high spots became bright again with almost no effort - that was the part I was dreading because I envisioned a lot of hand polishing. 


Once that was all done I dumped the leftover baking soda into the dish with the LOS in it to neutralize the solution.

I washed the sterling with liquid soap and water, then set the stones as usual.  I ran over them with a polishing cloth as a final step and could not be happier with the outcome. 

The small setting was for a titanium druzy:


And the larger setting was for a labradorite.  (I mean. These stones...I'm in love with them.)


It doesn't make sense for me to keep either of them; they wouldn't get enough wear to feel loved. I'll list them in my Etsy shop and hope they go to a good home.

Sunday, February 16, 2014

Copper grids

I've been experimenting with the rolling mill using a metal mesh with copper - I love the grid pattern.


I cut it to shape, gave it a heat patina and tried out my bracelet former on the hydraulic press.  I know this is the whole idea, but I'm always surprised at how well the texture "keeps" on the pieces when I use the press.  Maybe I just have to get used to it.


One of the resulting copper cuffs:


I need to take better pictures of this but with all of the snow I can't get to my favorite outside spot on the deck...maybe another time.

I had some leftover copper for earrings - I'm a fan of the contrast between the copper and the sterling accents.


I've listed the earrings in my Etsy shop; the cuff will come later since I need some better pictures.  I'm hoping all the snow will melt this week!

Saturday, February 8, 2014

Rolling mill hearts

Since I don't use my rolling mill every weekend (or even every month) it's helpful to do a little how-to refresher before I go out to the bench so I don't waste time or materials. I have a tendency to put too much pressure on the metal, forging it rather than printing it. I either leaf through a few of the metalsmithing books in my collection or go to tutorials online (check the end of this post for my favorite resources).

Once I get going, I can't believe how well the metals take the impressions and I love to experiment with textures I find around the house - common things that might generally be thrown away are the best.  Earlier projects I did to add texture with the rolling mill are here and here.

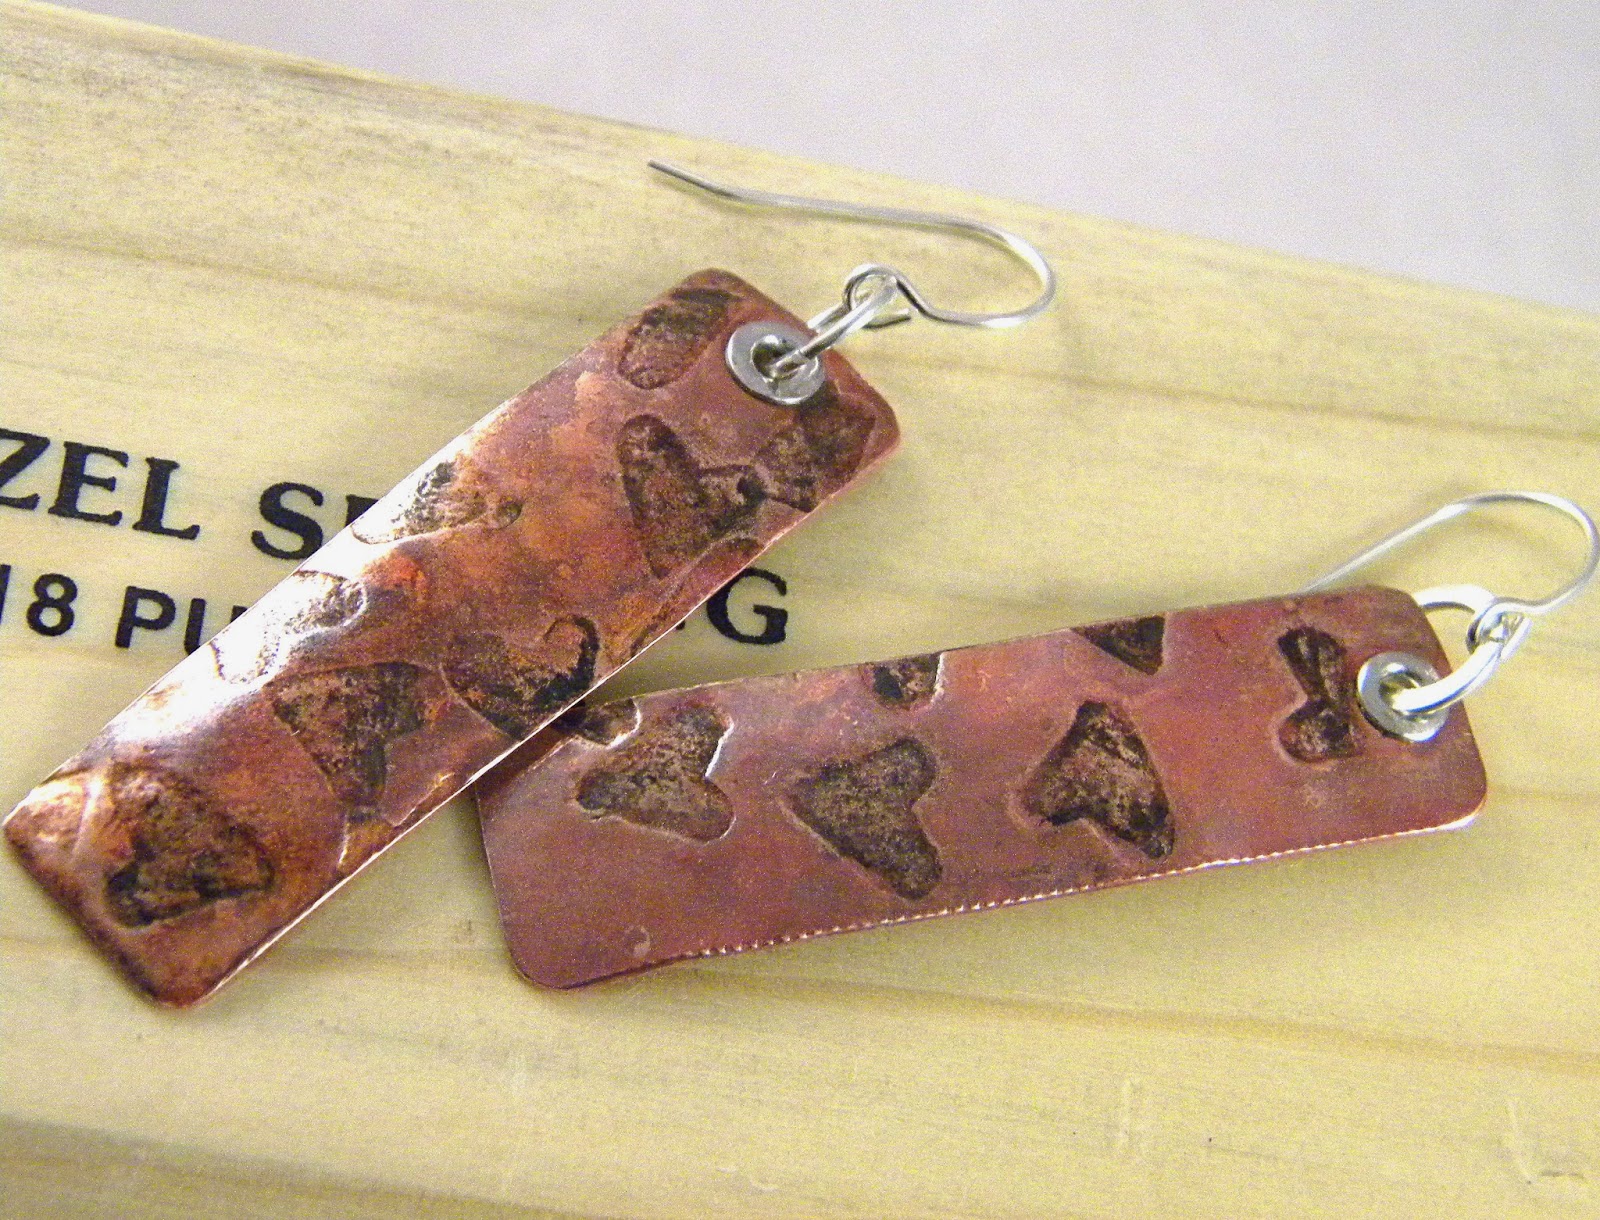
Last weekend I used a pair of paper punch scissors similar to these to pop a ton of little hearts out of a paper plate to stick on the copper before running it through the rolling mill.  I also cut some longer rectangular pieces to try on a different sheet.


I annealed my copper and then attached the paper plate pieces with rubber cement to hold them in place while going through the mill.


The copper sheet after the roller action - close up:


I'm still not sure what I'll use the "lines" sheet for, but I made some earrings out of the heart printed sheet. I kept the heat patina, which gives the earrings some unique hues. 


There are some great videos on YouTube that I always seem to go back to by Melissa Muir and Soham Harrison.  If you are new to the rolling mill or just need a refresher, these are perfect.

Wednesday, February 5, 2014

Snow day stamping projects

School is canceled, work is closed. Snow day number one was pretty fun - the temperatures were below freezing but not too bad.  We shoveled, we went sledding, we hung out and watched tv.  


Snow day number two has not been so great. Temperatures and wind chills are keeping us cooped up in the house.

I did manage to do a couple of stamped necklaces just to keep me from eating junk food all day long (which is one of my all time favorite snow day activities).  I like the simplicity of both of them...maybe I'll keep one for myself!


Sunday, February 2, 2014

Copper ladybug

My friend Andrea gets in touch with me from time to time to ask if I can make her something specific. I love it when she does this for two reasons: The things she asks for are often not things I would have just made on my own.  And that girl is always happy with the outcome - she is very easy to please.

So when she asked me if I could make her a ladybug pendant to hang from her copper neck cuff, I was excited to give it a whirl. I wanted to be sure we were thinking along the same lines so I sent her a quick sketch of what I was thinking and got the green light to go to the next step.


The basic components are fairly simple - two copper discs that are the same size for the base and the wings and a smaller piece for the top.


I cut a few slices of copper tubing to create the spots on the wings and soldered all of the pieces together. Then I added a slight concave shape to it by using a hammer to shape it over a wood dapping block.


The initial sanding and polishing was promising, but something just didn't feel right about it when it was all cleaned up. So after I tumbled it a final time I tried out a brushed satin finish. That felt right.  I admit I'm kind of in love with it. I can't wait to get it to AVD and see what she thinks!