
Monday, December 26, 2011
Holiday cookies
We made our holiday trays for neighbors a couple of weeks ago and included a lot of our usual elements--the chocolate covered pretzel sticks, brownies, and these cupcakes. My favorite addition to the trays were Chocolate Peppermint Bark Cookies. I'm not a big fan of the flavored Hershey's kisses, but I tried the candy cane flavor on these cookies and the amount of peppermint was perfect...not to mention that they were much less messy than my usual attempts to crumble up candy canes to use in this type of recipe.

I found
the recipe here; basically they are just sugar cookie chunks topped with chocolate
and peppermint...a great flavor combination for the holidays.

Tuesday, December 6, 2011
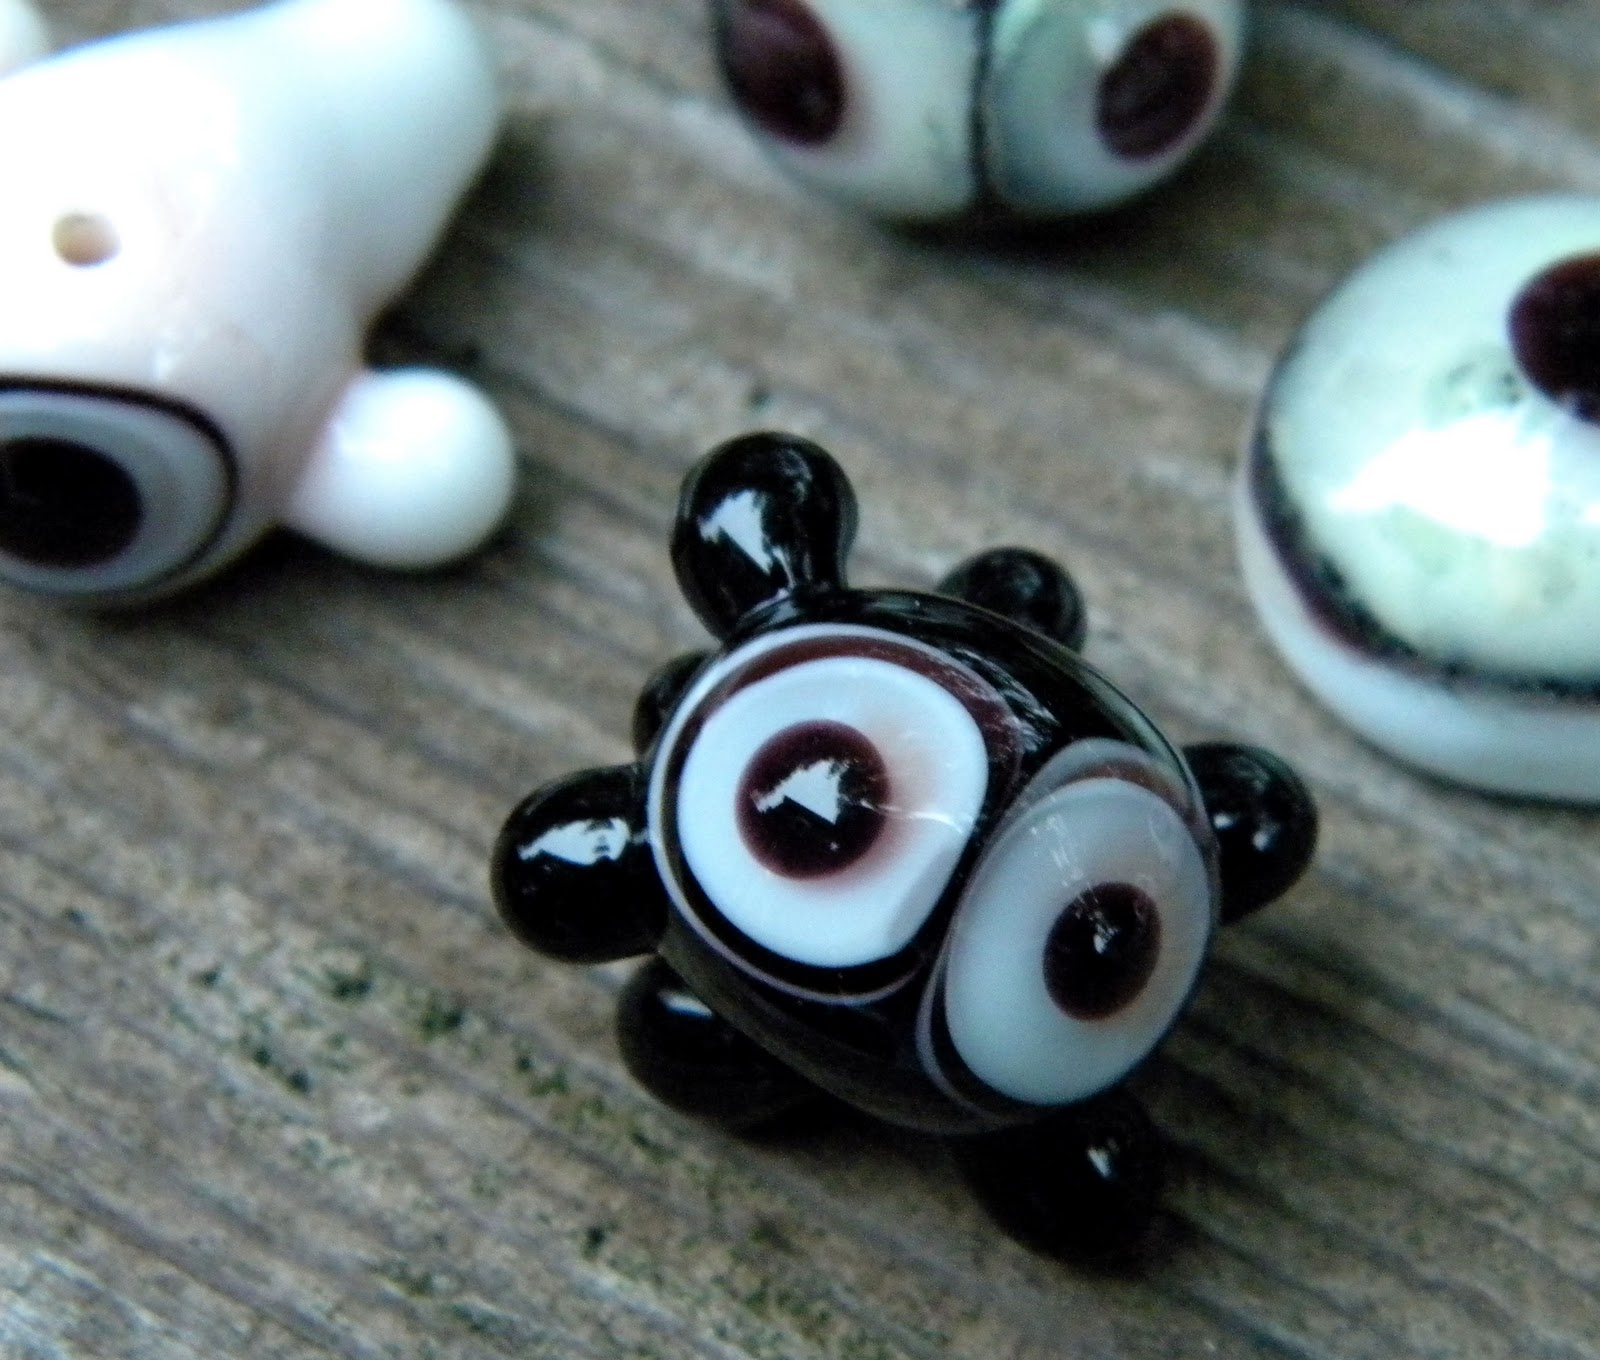
Holiday glass beads
It was finally time to take the little glass Halloween characters off of Ben's backpack...but we had so much fun with those that I wanted to do something similar with holiday characters.
Here's what we ended up with--a snowman, an elf, a penguin and Santa.

I really loved the little snowman, so I made a few more to mail out to my youngest nieces. Hopefully they will love them as much as I do!

Here's what we ended up with--a snowman, an elf, a penguin and Santa.

I really loved the little snowman, so I made a few more to mail out to my youngest nieces. Hopefully they will love them as much as I do!

Friday, December 2, 2011
Holiday bottle necklaces
The last few weeks have been packed with activity. Coordinating the Bizarre Bazaar event took more work than I could have ever imagined, but it was successful and I'm glad I had the opportunity to be involved at that level of things. We had 147 artists at the show this year--the most we've ever had--and now that we are a week out from it, it seems that most of the loose ends are taken care of and it's time to go back to everyday life.
So...remember these? Even though I think they are definitely what I would pick to hang around a wine bottle or my favorite soda, I decided to make a few others with holiday messages on them.


So...remember these? Even though I think they are definitely what I would pick to hang around a wine bottle or my favorite soda, I decided to make a few others with holiday messages on them.


Thursday, November 10, 2011
Bottle necklaces
After I made these, I had a discussion with my father and sister about how to incorporate those types of beads into other things. Dad brought up the idea of bottle necklaces and I had absolutely no idea what he was talking about.
I guess in the late 1800s/early 1900s, people often kept their alcohol in decanters with labels hanging from them to distinguish between the different types. So something like this:


I guess in the late 1800s/early 1900s, people often kept their alcohol in decanters with labels hanging from them to distinguish between the different types. So something like this:
That conversation started the crazy ideas rolling. Here's the thing: I know not one single person who owns decanters and would want a label like that....all of the bottles have paper labels on them. Sara mentioned seeing bottle necklaces as more of a decorative element, so that was the direction I went.
These are the first few...and very much my sense of humor, so who knows if they will actually appeal to anyone else. Time will tell!


Monday, November 7, 2011
Party cakes
Last week I made two cakes for parties...one for a going away celebration and another for a birthday.
The first one, a cake for someone moving on to a new job, included a caricature of the guest of honor sitting in a little sailboat with his guitar and a cup of coffee.

The second cake was one of my favorite flavor combinations--a chocolate cake with peanut butter ganache and peanut butter cup filling and peanut butter frosting. This was for a birthday and had the guest of honor sitting with his backpack and sketchbook, looking over a map.

Now it's really time for me to turn my attention to prepping for the Bizarre Bazaar--it's less than three weeks away!
Monday, October 24, 2011
More Halloween beads
Ben wanted to give out the Halloween beads on backpack clips for favors at his birthday party, so I made more of these. I added some pumpkins and mummies to the mix and made sure all of them had great glow in the dark elements.


And then there was this guy:

Um, no. This was my stab at Frankenstein, but he looks more like Frankenstein dressing as Groucho Marx for a Halloween party. So I set that one aside and may try again, but it's getting late in the season to keep turning out the Halloween characters....maybe next year.


And then there was this guy:

Um, no. This was my stab at Frankenstein, but he looks more like Frankenstein dressing as Groucho Marx for a Halloween party. So I set that one aside and may try again, but it's getting late in the season to keep turning out the Halloween characters....maybe next year.
Friday, October 21, 2011
The second birthday cake
The Monster House rice krispie cake was gone by the time Ben's actual birthday rolled around. For his celebration at home, he picked a chocolate cake in the shape of a pumpkin. I told myself I was going to make it small since it was the second cake and it was just for our family....but that didn't really happen.
I made two chocolate cakes in bundt pans and stacked them with chocolate malt buttercream filling and frosting. Before I covered them with fondant I turned a small mason jar over (I have a lot of those around) to put in the center part of the cake to support the stem.
A round of airbrush (have I mentioned how much I love that machine??) and some black fondant pieces for the face finished it off.

I didn't know where to put the candle, so I made a chocolate shot glass with this silicone Halloween mold and filled it with frosting to hold it. The online reviews for it aren't very good, but I've used it with poured sugar and chocolate and it's easy to use and always works on the first try.
Time to turn my attention back to the jewelry for a while...the Bizarre Bazaar is in about a month and I still have a lot of prep to do for that!
Tuesday, October 18, 2011
Monster House cake

October is a big deal in our house. Both of the boys' birthdays fall in the middle of the month, and Ben and I adore Halloween. We watch Halloween shows and movies on Nickelodeon and Disney over and over again (how many Halloweentown movies are there anyway?). One of our favorites is Monster House, and Ben decided he wanted the cake for his birthday party to look like the house in that movie...something like this:


Since this was more showpiece and less dessert, I wanted to be sure it was stable enough to hang around for a couple of days. I coated the entire thing in chocolate, then cream cheese frosting, and finally fondant.
Lots of details followed...poured sugar for the glass windows, little LED lights to go inside the windows, airbrushing...and chocolate-dipped grape stems for trees. Ben loved how it turned out!
Lots of details followed...poured sugar for the glass windows, little LED lights to go inside the windows, airbrushing...and chocolate-dipped grape stems for trees. Ben loved how it turned out!


Thursday, October 6, 2011
Peanut butter cup brownies in a jar
Since shipping cupcakes in a jar worked out so well, I decided to try it out with brownies to see how they would fare...I think they are actually better than the cake--everyone who tried them approved.
I started with brownie batter and added chopped up Reese's peanut butter cups (you can't go wrong with that combination. Ever). I baked them in the smaller mason jars at a lower temperature (325) because they were so thick. I ended up leaving them in the oven for almost 45 minutes--I just kept checking them until they were done since I had no idea how long to let them bake.
Anything in the jars does better with a ganache over the top, so Ben helped me make peanut butter ganache and pour it in over the brownies. We had a few after dinner and I froze the rest overnight. We shipped a bunch of them to Grandma for her birthday--success! I will definitely be making more of these.

Peanut Butter Ganache
*This recipe is for a thin ganache consistency--if I wanted to use it for filling or frosting a cake I would reduce the cream or increase the chocolate a bit
* 10 ounces milk chocolate, coarsely chopped
* 1/2 cup smooth peanut butter
* 1 cup heavy cream
* 1 teaspoon vanilla extract
To make the ganache, put the chocolate and peanut butter into a heatproof bowl and set it aside. Pour the vanilla extract and the cream into a saucepan over medium heat and bring it to a simmer. Pour the cream over the chocolate mixture, cover, and let it all sit until the chocolate is mostly melted--about two minutes. After that, stir the mixture until the everything is completely melted and smooth.
Sunday, September 18, 2011
Glass practice
There is no wasted session when it comes to glass. Even though it's possible to spend two hours over the torch and end up without a useable bead (this happens often), I learn something about the way the glass moves in the heat and where to place extra glass if I want to move a design element to the middle or the side...it's always helpful to the beads I make later on.
Last week Ben drew some adorable little Halloween characters and asked me if I would make him some beads like the guys in his picture. Halloween is one of my favorite times of the year, so there was no way I was going to turn down the request.

So here is what I came up with--
the spider:

and the skull:

But I couldn't just stop there...so I made a few more things to go along with those two.
A witch:

I love the wart.
A ghost:

A bat:

and an eyeball:

Here is the whole group:

and the final set put together for Ben to use as a zipper pull on his backpack:

But what is Halloween anything without glow in the dark elements? So I embedded some glow in the dark glass in the layers...awesome.

Last week Ben drew some adorable little Halloween characters and asked me if I would make him some beads like the guys in his picture. Halloween is one of my favorite times of the year, so there was no way I was going to turn down the request.

So here is what I came up with--
the spider:
and the skull:

But I couldn't just stop there...so I made a few more things to go along with those two.
A witch:

I love the wart.
A ghost:

A bat:

and an eyeball:

Here is the whole group:

and the final set put together for Ben to use as a zipper pull on his backpack:

But what is Halloween anything without glow in the dark elements? So I embedded some glow in the dark glass in the layers...awesome.

Monday, September 12, 2011
Broom cast pieces
I love everything about broom casting. The process is involved but the ability to put my silver scrap to genuine use is fantastic. (Especially now that silver is $40 an ounce!)
Retrieving the broom cast pieces from the straw is like opening presents--there are fabulous surprises in there. Some duds too, but it's very cool to see the results. Some of the silver sort of wraps around the individual straw pieces and I have to slide them off the end to see what it looks like. Those are great to use in jewelry because they have little areas that stick out and under and I can tuck a few pieces together.
Assembling them into an actual useable piece of jewelry is extremely time consuming. It's like putting together a teeny tiny puzzle by dropping the pieces into place with tweezers. I map out the piece by laying it all out, then take it apart to flux and add solder to it, then put the puzzle back together again, hopefully in the same (ish) order it was in before. My family thinks I'm out at my workbench making jewelry, but in my head I'm really doing this:

I have the tweezers. I grasp the silver and care.full.y. place it where I think it will go. Sometimes it stays there, but it often slides or falls, occasionally taking other pieces with it. So all of this stacking and re-stacking takes forever.
The soldering is also a guessing game; under the torch the piece seems to swell from the heat and the flux as it sort of bubbles up. When everything settles back in, the pieces don't always end up where they're supposed to. Soldering the broom castings = multiple attempts.
So it can be frustrating and unrewarding. But when it works, it's glorious...probably because the road to the final product is filled with disappointments.
Over the holiday weekend I made broom castings to work with and made two rings. Forget the sanding and polishing--just the broom casting sessions and the soldering took almost four hours.
But I love them. And that's really an understatement. I think they're weird and cool and interesting and fun all at the same time. And if nobody else thinks so....well, they both fit me and I would be happy to keep them!


Thursday, September 8, 2011
Not so hi hats
I've seen these all over the blogosphere and have wanted to try them for literally years--Hi Hat cupcakes. I'm not sure where the name really comes from but the concept is simple...cupcakes with chocolate dipped frosting.

I started with chocolate cupcakes and peanut butter frosting (as far as I'm concerned you can never go wrong with that combination). The general idea is that you swirl the frosting high on top of the cupcake--at least that's how I've seen them in the past--then put them in the freezer for a while to firm up before dipping them in melted chocolate.
I think my frosting turned out to be more like regular height...something to keep in mind for the next time. Once they were all frosted, I put them in the freezer while I got the chocolate coating ready.
I poured a bag of milk chocolate chips in a glass pyrex measuring cup and heated it in the microwave for 20 seconds at a time, stirring in between, until they were completely melted. I added a couple of tablespoons of peanut oil (I'm not sure it has to be peanut oil, but I had a little note from some recipe I found forever ago that said peanut oil...so that's what I used) and stirred it in. I dipped the frosting portion of the semi-frozen cupcakes in the chocolate sauce and set them up to cool--easy. Messy, but easy.

The only downside to these is that you have to store them in the fridge. If they are left out at room temperature, the chocolate doesn't hold up too well.

Monday, September 5, 2011
Glass focal bead
This lampwork bead is another product of the vacation time I took at the beginning of the school year. I added green copper glass and fine silver beads to an ivory base, then finished it with a leather cord and sterling silver findings.


Friday, August 26, 2011
Vacation goodies
Ever since I became a mother, my vacation days from work have primarily been about my kids' schedules. I take vacation days at the beginning of school to make sure everyone gets started ok, I take vacation days at the end of school to attend all of the ceremonies and do a little celebration to kick off the start of summer. I take vacation days when school is out to be home with the kids.
One of the things I love about the school days off is that I can spend lots of time with the kids (well, "kid". One will hang out with me and the other won't, but I should take that up with a therapist rather than in a blog post) but also have several hours in between to work on my own projects. Generally these activities swirl around cake or jewelry and I can get completely lost in either of those for hours. I walk around with my phone in my pocket, earphones plugged in, listening to satellite radio through an app for hours. Most often it's the 80s music channel. And I sing. Loudly and very badly. So lucky passers-by can surely hear me when I work at the jewelry bench in the garage with the door open. Nothing recharges me like working with glass and metal does, especially with the music playing and hours before I have to be anywhere.
So last week with the start of school, I took Wednesday through Friday off. I probably got at least eight hours of bench time in, and it made me ridiculously happy.
I started with some metal work; earrings and a necklace from 12 gauge sterling:


Friday, August 19, 2011
Catching up
I have actually been making things, I just haven't gotten things organized and photographed. So this is just a quick update.
My sister made a lemon/blueberry cake for some friends who were getting married and asked if I would help decorate it. So she made all of the materials and I just put it together. I think she uses an Italian meringue buttercream recipe-it sounded like the recipes I've seen for it, anyway. I've never tried it, and that's because every single review I've seen for it raved about how it wasn't as sweet as a regular buttercream. Why would anyone want that? It was really light and fluffy...like decorating with stabilized whipped cream. Easy to frost with, but not so good for piping.

I've also done some glass work in the last couple of weeks, starting with a few simple necklaces on leather cords.

Sunday, August 7, 2011
Spinner bracelet
One of the reasons I buy books on jewelry making techniques is because I seem to take in the information in layers. I read about a process, try it, move on to other projects, then go back to the book and realize there is something I could do to improve my work. This is especially true with lampwork and metal forming.
Last weekend my kids and I went home to visit my parents, most of my siblings, and their kids and/or significant others. (Yes, I still call it "home" and always will.) When I packed, I stuck the Complete Metalsmith: Professional Edition and Foldforming books in my bag for downtime reading. I reread a few of the sections right before bed (I did put them aside to go downstairs and ask the youngsters to quiet down at one point...you know you are the old hag sibling when you issue noise citations for a card game at 11:30pm) and was inspired to do some metalwork when I got back.
I love using stakes to forge metal, but I have a lot to learn...maybe I just like to smash the metal with a hammer. I worked copper over a metal stake with a plastic tipped hammer to form a concave bracelet. Then I used a ball peen hammer on parts of the metal for some texture and decided to give it a little spinner detail, like these rings.


Last weekend my kids and I went home to visit my parents, most of my siblings, and their kids and/or significant others. (Yes, I still call it "home" and always will.) When I packed, I stuck the Complete Metalsmith: Professional Edition and Foldforming
I love using stakes to forge metal, but I have a lot to learn...maybe I just like to smash the metal with a hammer. I worked copper over a metal stake with a plastic tipped hammer to form a concave bracelet. Then I used a ball peen hammer on parts of the metal for some texture and decided to give it a little spinner detail, like these rings.


Subscribe to:
Posts (Atom)